what you need to install amp to mk6 gti
1999-2006 Volkswagen Golf and GTI
Upgrading the stereo system in your Golf or GTI
1999 • 2000 • 2001 • 2002 • 2003 • 2004 • 2005 • 2006

In brief: This Crutchfield Research Garage article gives you an overview of your Volkswagen'due south stock stereo system and your aftermarket upgrade options. Employ our vehicle selector to notice the gear that will fit your Golf or GTI.
Overview of the Volkswagen Golf
There's always been a lot to like nigh the VW Golf game. Even in base of operations form, the Golf is stylish, practical, comfortable, and fifty-fifty kinda fun. In GTI form, it's all of those things, but with a lot more power and fifty-fifty better handling, which makes it even more fun.
Know what else is fun? An awesome stereo. Whether you're planning a larger customization projection or just looking for a way to add some joy to your daily driving, we can help you find the right gear for your Golf.
This Golf game generation debuted in mid-1999 and stuck around until mid-2006. Because of those odd mid-year intros, y'all'll exist asked to specify whether you accept the "former" or "new" torso mode when you lot enter your vehicle info for '99 or '06 cars. Hopefully, this will eliminate any defoliation, but if yous have questions, just give us a call.
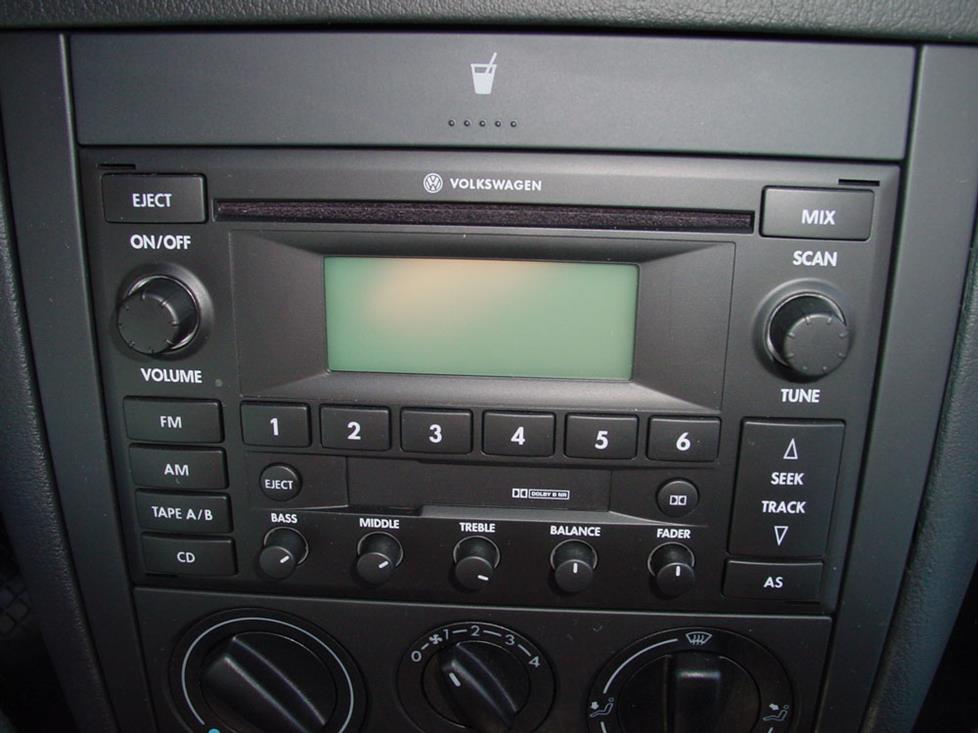
The double-DIN (shown) and single-DIN mill radios are very easy to remove and supersede (Crutchfield Enquiry Photo)
Factory stereo system
The Golf's manufactory radios are pretty basic by today's standards. Packet-wise, there was the base of operations system and the optional Monsoon system. The radios look pretty much the same, though, and so how do you tell which system you have? If yous take the Monsoon arrangement, the receiver display will wink the word "Monsoon" when you turn it on. Or, yous tin look for the amplifier, which tin can be plant on the right side of the rear deck in sedans.
Radio replacement is pretty easy in these cars, just on 2004-upwards models equipped with OnStar, you'll lose the vocalism prompts when yous replace the mill radio. This is a pretty old edition of OnStar, though, and then y'all might not miss information technology.
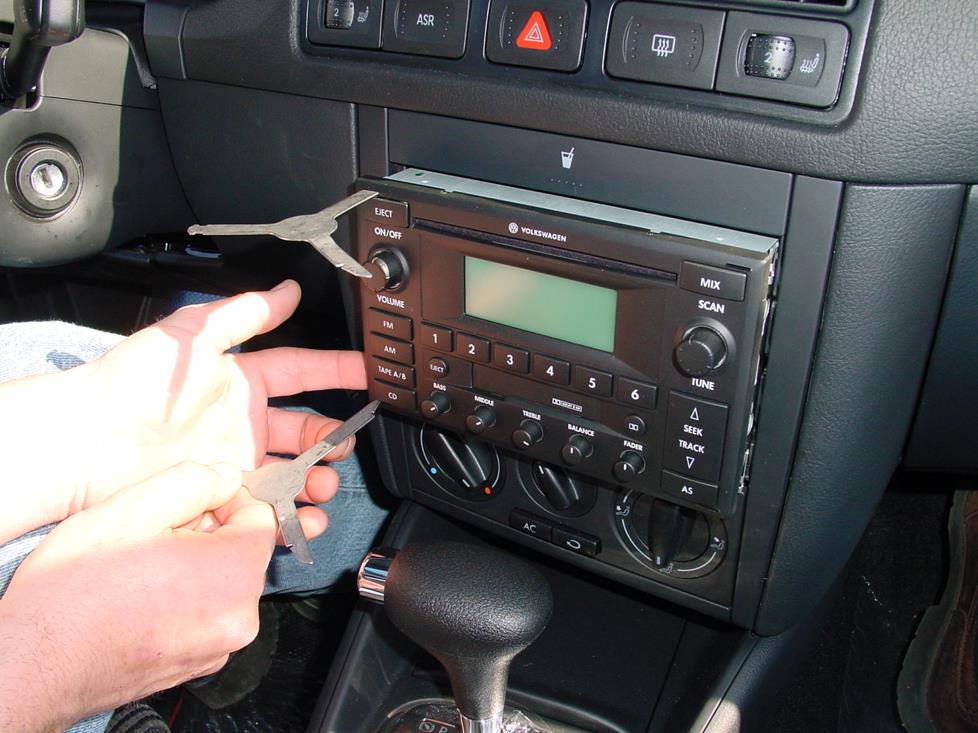
Y'all'll demand two of these tools to remove a single-DIN radio and four for a double-DIN like this one (Crutchfield Enquiry Photo)
Replacing your manufacturing plant radio
Replacing the radio in your Golf or GTI is pretty uncomplicated. If y'all're new to auto sound DIY, this tin be a real confidence-architect.
You'll starting time by setting the parking brake and disconnecting the negative battery cable to preclude any electrical short, considering nothing destroys ane's confidence more than beingness electrocuted past a motorcar that'south rolling slowly downwardly a hill. One time you lot've done those things, you're gear up to become started. Y'all'll need i pair of VW-specific radio removal tools for a single-DIN (2" alpine) radio and two for the double-DIN (four" tall) models, and they're included with your Crutchfield stereo purchase.
Insert the tools into the slots on each side of the manufactory radio face and slowly press them in until yous hear a click on each side. The click will unlock the radio, and yous'll pull the tools towards y'all to remove it. Disconnect the wiring harness and unplug the antenna lead, and so remove the old radio and kickoff installing the new one.
Detailed stereo and speaker removal instructions

With step-by-pace disassembly instructions and plenty of upward-close, detailed photos, our exclusive Crutchfield MasterSheet™ takes the guesswork out of removing the manufacturing plant stereo and speakers. It's free with your Crutchfield order, or you can purchase 1 separately for just $9.99.
When you buy your stereo from Crutchfield, we'll requite you a deep discount on the wiring adapter you'll demand to connect the new receiver to the factory wiring. It'll come up with its own instructions, which y'all'll follow as you connect it to the receiver.
With almost all aftermarket receivers, you lot'll have to remove the factory radio's rear back up bracket. This isn't hard, just work carefully even though no one will e'er see anything you lot mess up. And if you're using an antenna adapter, be sure the antenna cablevision (lead) is plugged in and the power wire is connected to the receiver's power antenna wire before you install the receiver.
Once the new receiver is in place and hooked upwardly, exam it and make sure information technology's working before you move on to anything else.
Tools needed: VW radio removal tools
Steering wheel audio controls
If y'all're Golf or GTI has steering wheel sound controls, you can retain them when y'all install a new stereo. When you lot enter your vehicle information, our database volition choose the adapter you demand to brand your factory steering wheel controls piece of work with your new receiver.
Shop for auto stereos that fit your Volkswagen Golf

You lot'll need to remove the rubber ring surrounding the woofers, and then drill out the rivets (Crutchfield Research Photograph)
Replacing your mill speakers
The degree of difficulty involved in speaker replacement varies a bit, but it's still a chore that'due south well within the range of the boilerplate car audio DIY-er. There are some slightly challenging bits, only you can do this.
Removing the front door woofers
Removing and replacing the door speakers will make practiced use of the confidence gained while replacing the radio. It'southward not a hard job, simply depending on how your car is equipped, there tin can be some interesting parts. Once you have the old ones out, y'all can install your selection of five-i/iv", 6-1/two", or half dozen-three/four" aftermarket woofers (component systems are highly recommended here) and enjoy vastly improved sound whether you replace the radio or non.
You'll need to remove the door panels to get to the woofers and the tweeters, a procedure that's detailed in the Crutchfield MasterSheet that's included with your stereo or speaker buy. At that place are some differences between the driver's side and passenger's side doors, and another differences that depend on whether your car has manual or power windows. Either way, it's all covered in the MasterSheet.
One time you lot've removed the panels, you'll demand to remove the safe band surrounding the woofers. Utilize a cordless drill and a 3/viii" flake to drill out the rivets securing the speaker associates to the door. Pull out the assembly, disconnect the harness, and remove the speaker. Use a nail punch to knock out the remaining rivet bits in the mounting surface to make certain nothing interferes with installing the new ones.
Your speaker purchase includes (if needed) mounting brackets to assistance install your new speakers. Secure each speaker to the bracket following the instructions supplied with the brackets, and then identify the assembly in the speaker location, marker your new mounting holes, and drill new holes with a one/8" bit. For terminal installation, make sure the bracket is positioned with the slot for the wires on peak. If your new speakers don't include mounting screws, you'll demand to make a trip to the hardware store before you begin the installation.
Drilling isn't hard, of course, but you lot're drilling into a car – your car – and then yous'll want to exercise information technology right. Brand sure yous know what's around and behind what you lot're drilling into, work advisedly, and e'er wear eye protection.
When it comes to connecting the speakers, at that place's another variation to note. If your auto has the Monsoon organisation, your purchase will include the wiring harness adapters needed to brand the necessary connections. If your car has the base of operations model stereo system, there's no harness available at this time, so you'll need to use Posi-Products speaker connectors to connect the new speakers to the manufactory wiring system.
One time the new woofers and tweeters are installed, test them out to make sure they're working properly. If they are, and then y'all're gear up to put the doors back together. When you do, make sure the locks and latches are performance properly. Now, let'south talk most those tweeters.

Replacing the tweeters involves a bit of work, but information technology's naught a DIY-er tin can't handle (Crutchfield Research Photo)
Removing the front tweeters
The factory tweeter is a 1.569" model that's molded into the door sail panel. You'll exist able to go to them when you remove the door panels. They're kind of tricky to remove, but it can be done if you work carefully.
There are no direct replacements bachelor, but pretty much any component system tweeters will fit if you secure them with universal backstraps, hot gum, or silicone. No wiring harness is available for this location, so you'll need to use Posi-Products speaker connectors to connect then to the factory wiring.
Tools needed: Panel tool, Phillips screwdriver, flat blade screwdriver, 1/eight" and 3/8" socket, ratchet & extension, hole punch, Torx T-xv driver
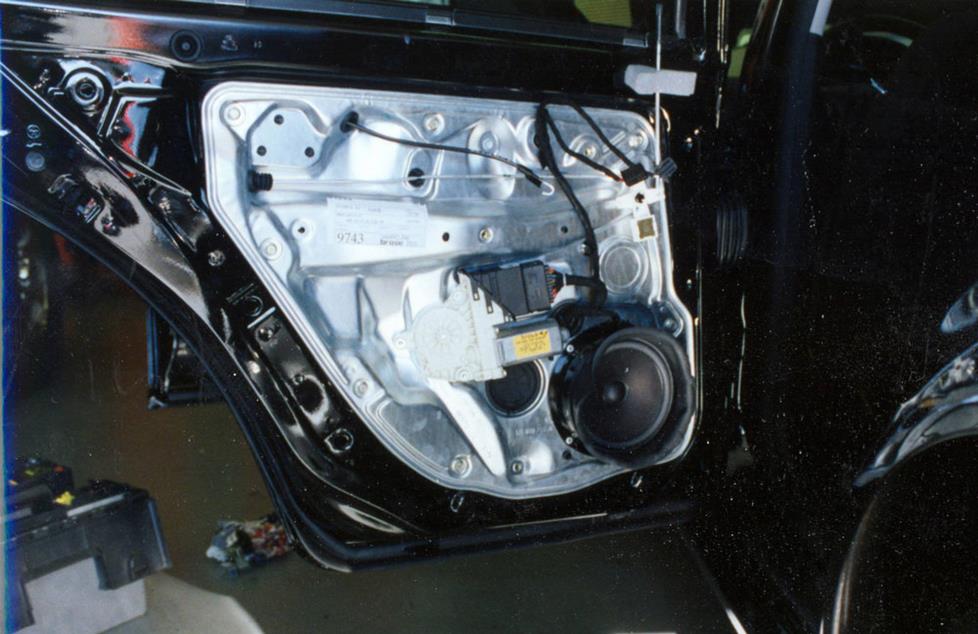
The rear door speakers are a lot like the ones upwards front. Same goes for the removal process. (Crutchfield Research Photo)
Removing the rear door speakers (4-door)
Pretty much everything we mentioned higher up too applies to the rear door woofers and tweeters. That took a long time to type, and so we're not going to go through information technology again. Our much-more-industrious Research Squad did go to the trouble of writing it all down, however, and all the details can be found in your MasterSheet.
If you encounter trouble here, or at any other point in your installation, remember that your Crutchfield stereo purchase as well includes gratis tech support for the life of your gear. We're hither if you need us, then give u.s.a. a telephone call.
Tools needed: Panel tool, Phillips screwdriver, flat blade screwdriver, 1/eight" and three/eight" socket, ratchet & extension, pigsty punch, Torx T-fifteen driver
You'll need to remove the rear side panels to get to the speakers. It's not hard, simply information technology tin take some time. (Crutchfield Research Photo)
Removing the rear side speakers (2-door)
The 6-1/ii" rear side panel woofers institute in the two-door models tin can be replaced with a wide variety of aftermarket models. Some will require mounting brackets, which will be included forth with your Crutchfield speaker buy. The tweeters are a smidge under 1-1/2" and tin exist replaced with lots of different component tweeters.
The stock woofers only produce bass, and so the simplest swamp will involve a set of component speakers. If you want to get full-range sound from this location, y'all'll need to install an aftermarket stereo and bypass the factory amp past splicing together its input and output wires. Like we said, component speakers are easier.
As for the bodily speaker removal procedure, it's a bit involved, but information technology's still exercise-able for a DIY-er. You'll start past folding upwardly the rear seat bottom and pressing the seat bars toward each other to remove it. Lower the rear seat dorsum, heighten the outer edge, and work the seat latch away from the center seat to remove the seat. Be sure to store the seats in a clean, dry identify until it'south time to put them dorsum in the auto.
Remove ane plastic nut located on the bike well and pry out the frontwards front edge of the rear side console to release two retaining clips. Pry out bottom front border of panel to release ii more plastic clips Disconnect the tweeter harness while you're still holding out the console.
Keep holding out the panel and push toward the rear of the car merely enough to disconnect two metallic clips from the other panel. Slowly work the panel out of car and set it aside. Remove the four Phillips screws securing the speaker, disconnect information technology, remove it, and get to work installing the new woofer.
If you're replacing the tweeters, the work's pretty simple, but at that place are no mounting brackets for these speakers, so you'll need to secure them with universal backstraps, hot gum, or silicone. No wiring harness is available for this location, so you'll demand to utilise Posi-Products speaker connectors to connect then to the factory wiring.
Once you're done, be sure to test the speakers to make sure they're working. If they are, start putting the panels back together. If you run into trouble, retrieve that your Crutchfield speaker purchase too includes gratuitous tech support for the life of your gear. Nosotros're hither if yous demand us, so give us a call.
Tools needed: Panel tool, Phillips screwdriver
Shop for speakers that fit your Volkswagen Golf game
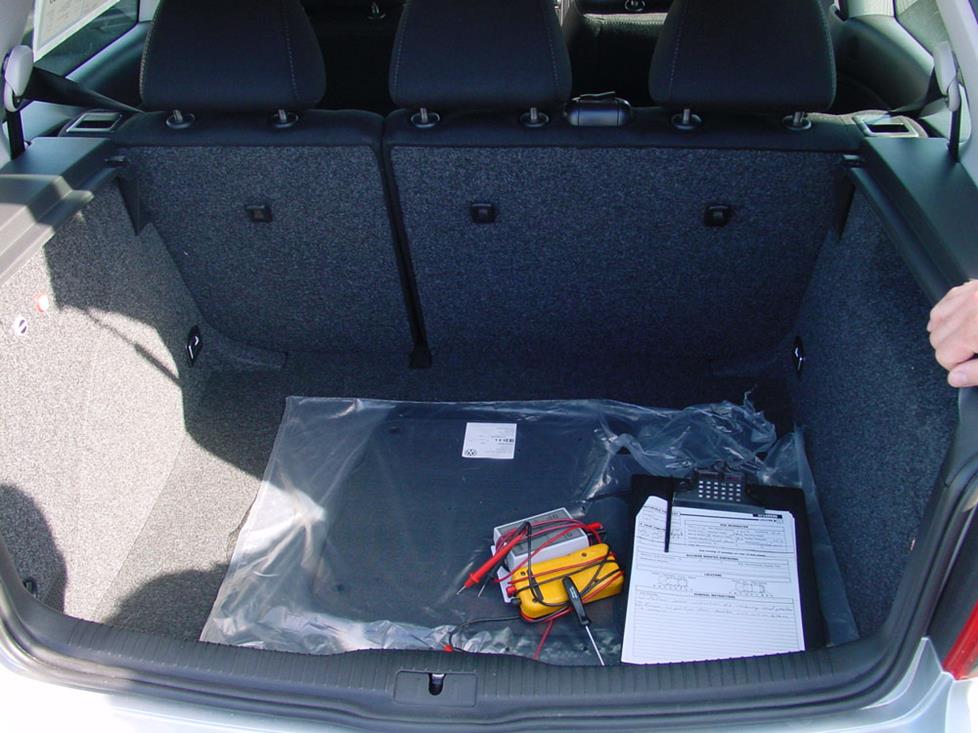
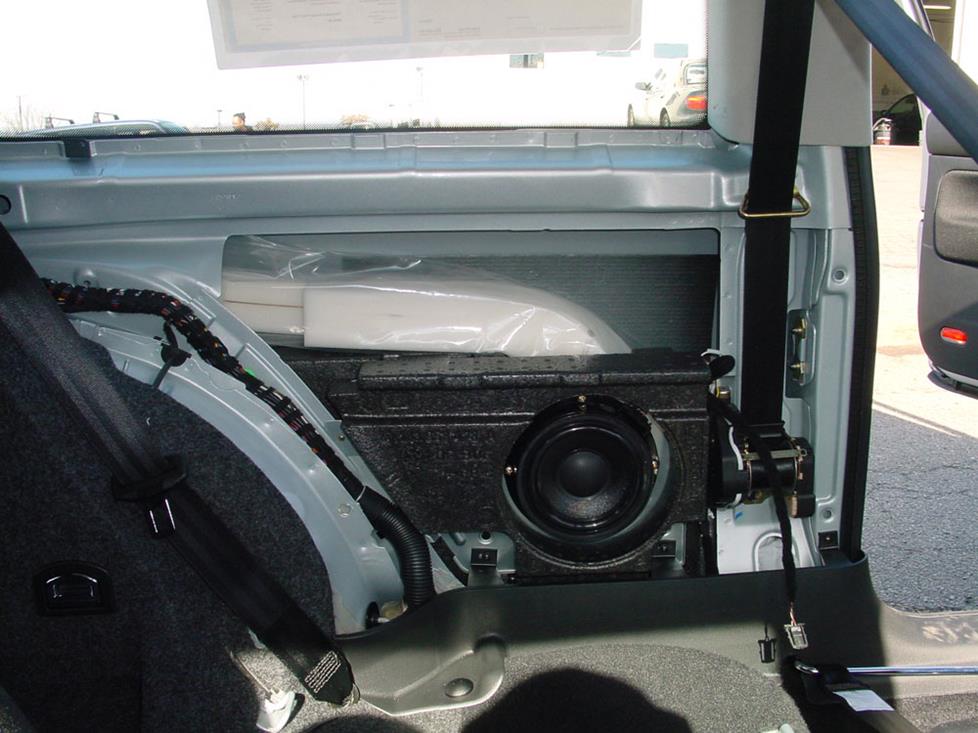
In that location's plenty of room for a subwoofer box in the Golf's trunk (Crutchfield Research Photo)
Bass in your Golf or GTI
If you're really serious most bass, these cars do offer some space for a subwoofer box. Your Golf game or GTI sports a 39" Due west x 18" H 10 31"/23" D space in the cargo area. How big you get depends on how much yous apply that area for everyday tasks. If you're worried about losing cargo room, consider a smaller powered subwoofer.

A 4-channel amp (like this 1 from Focal) will really improve your car'southward sound.
Other options for your Golf or GTI
With a machine similar these Volkswagens, there are lots of ways to upgrade your in-car experience. Here are some of the ways Crutchfield can help.
Add an amp (or two)
A new 4-channel amplifier will aid you lot get the most out of your new speakers. You'll get cleaner power (and a lot more of it), which will result in much, much better audio. A mono amp tin can provide the juice you lot need for your new subwoofer, too.
Quiet road noise with Dynamat
These are reasonably quiet, well-assembled cars, only they have a few years on them and that's when things get squeaky and loud. A Dynamat Xtreme Door Kit will actually maximize the affect of your new system. This heavy-duty insulating material is like shooting fish in a barrel to install, and it really makes a difference. One kit should exist more than enough for your Golf.
Calculation motorcar security
Installing a security system in your Golf game isn't easy (security systems rarely are), simply it's less complicated than it could exist. Our Crutchfield Advisors can help figure out what you lot demand to become the job washed, but nosotros usually recommend taking your car and new gear to a professional person installer.
Shop for car security systems for your Volkswagen Golf game
Find the audio gear that fits your motorcar or truck
Visit our Outfit My Car page and enter your vehicle information to encounter stereos, speakers, subs, and other audio accessories that will work in your vehicle.
Source: https://www.crutchfield.com/ISEO-rgbtcspd/learn/1999-2006-volkswagen-golf-and-gti.html
0 Response to "what you need to install amp to mk6 gti"
Post a Comment